Learning Adobe Photoshop Elements 8
by Greg Bowden (370 pages)
The tutorials have been developed for Adobe Photoshop Elements 8 on the Windows and Macintosh systems as single or multi-user versions. The multi-user version has a detailed project at the end of each Module so that students can practice the skills that they have learned from the module.
 |
Module 1 introduces the Adobe Photoshop Elements 8 basics such as the use of layers, drawing tools, selection techniques, modifying images, combining shapes and photographs, adding text to designs, adjusting the look of photographs, using masks, using smart brushes and saving files in different formats. |
Prices (Including GST)
Products can be purchased using a School Purchase Order Number, Credit Card or PayPal.
Learning Adobe Photoshop Elements 8 Module 1 Single-user, $A11 |
|
Learning Adobe Photoshop Elements 8 Module 2 Single-user, $A11 |
|
Learning Adobe Photoshop Elements 8 Module 1 Multi-user, $A132 |
|
Learning Adobe Photoshop Elements 8 Module 2 Multi-user, $A132 |
- Chapters and Sample Pages
- Chapter Descriptions
Module 1: Photoshop Elements 8 Basics
Contents (Modules 1 & 2) |
view pages (149k) |
Chapter 1: Introduction to Photoshop (23 pages) |
view sample pages (892k) |
Chapter 2: Selecting Parts of Images (22 pages) |
view sample pages (535k) |
Chapter 3: Modifying Images (18 pages) |
view sample pages (496k) |
Chapter 4: The Drawing Tools (17 pages) |
view sample pages (628k) |
Chapter 5: Combining Shapes (14 pages) |
view sample pages (858k) |
Chapter 6: Adding Text to Designs (18 pages) |
view sample pages (542k) |
Chapter 7: Adjusting the Look of Images (16 pages) |
view sample pages (539k) |
Chapter 8: Combining Photographs (10 pages) |
|
Chapter 9: Creating Masks (13 pages) |
view sample pages (487k) |
Chapter 10: Smart Brushes (10 pages) |
|
Chapter 11: Saving Files (9 pages) |
|
Project 1: Create a Poster (Multi-user only) |
|
Module 2: Photoshop Elements 8 Advanced Exercises
Chapter 12: Repairing Parts of Images (15 pages) |
view sample pages (481k) |
Chapter 13: Applying Filters (10 pages) |
|
Chapter 14: Creating Balls and Spheres (16 pages) |
view sample pages (484k) |
Chapter 15: Artistic Filters (16 pages) |
view sample pages (515k) |
Chapter 16: Adjustment Layers (14 pages) |
view sample pages (467k) |
Chapter 17: Enhancing Photos of Faces (16 pages) |
view sample pages (489k) |
Chapter 18: Using Rulers and Grids (18 pages) |
view sample pages (485k) |
Chapter 19: Creating Graffiti (10 pages) |
|
Chapter 20: Enhancing Photos (16 pages) |
view sample pages (468k) |
Chapter 21: Displacing Images (10 pages) |
|
Chapter 22: Creating Text Effects (10 pages) |
view sample pages (559k) |
Chapter 23: Useful Tools (15 pages) |
|
Project 2: VicSports (Multi-user only) |
|
Module 1 Chapter Descriptions
Chapter 1: Introduction to Photoshop Elements 8
This chapter introduces the Photoshop basics such as the screen sections, the Tools palette, Zoom tools, the Navigation palette and how to use layers, including how to turn layers on and off, add new layers, delete layers, name layers, change the layer order and change the layer opacity.
Chapter 2: Selecting parts of Images
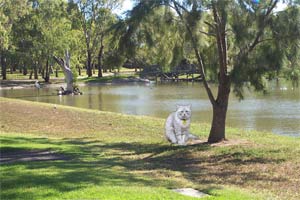
This chapter demonstrates how to select parts of images and photos. This includes using the Edit Marquees, the Lasso tools, the Quick Selection tool and the Magic Wand which are used to select a cat in one photo and transfer it to another.
Chapter 3: Modifying Images
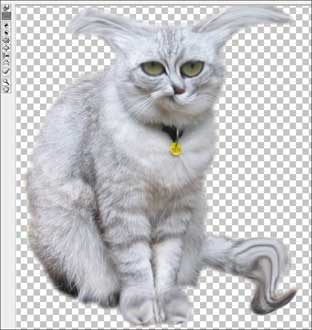
Demonstrates how to apply effects to photos using the Liquify Tool and tthe Filter Gallery.
Chapter 4: The Drawing Tools
Demonstrates how to use the drawing tools such as rectangles, ellipses, lines and custom shapes, then adding effects to those shapes. Students are shown how to combine photos with shapes, for example, placing a photo within a frame shape.

Chapter 5: Combining Shapes
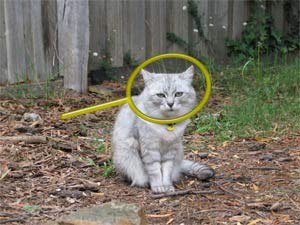
Demonstrates how to combine shapes and photos together to create designs. As an example, students are shown how to magnify a cat's head then draw a magnifying glass over it.
Chapter 6: Adding Text to Designs
This chapter shows students how to enter text and apply effects to that text such as colour, text warp, style effects, 3D effects, typing text along a path and more detailed text formatting. Text is then added to photos and images, for example the following poster is created:

Chapter 7: Adjusting the Look of Images
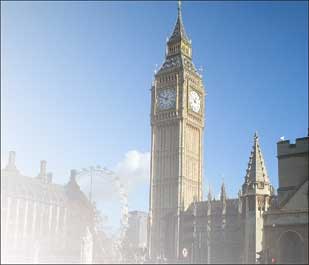
Shows students how to edit and improve photographs using the many tools that Photoshop provides. Some of the tools used include the Blur tool, the Sharpen tool, the Smudge tool, the Sponge tool, the Dodge tool, the Burn tool, Gradient Fills, the Red Eye tool and removing backgrounds tools.
Chapter 8: Combining Photographs
Demonstrates how to use the Photomerge and Photo Books to view or combine multiple photos. Students are then shown how to adjust the combined photos to improve the panoramic effect.

Chapter 9: Creating Masks
Introduces students to the concept of masks so that just wanted parts of images are displayed, and how to apply styles to masks.

Chapter 10: Smart Brushes
Introduces students to the Smart Brush filters that can be used to enhance images. The Blue Skies brush is used to enhance the sky in an image. The Reverse - Black and White brush is used to displace just part of an image in colour. The Pearly Whites and Lipstick brushes are used to enhance the smile of a person in a photo.

Chapter 11: Saving Files
Students are shown a variety of different ways Photoshop documents can be saved and exported, including saving TIFF files, JPEG and GIF formats, and the Save for Web command.
Project 1: Create a Poster
The Multi-user version provides a project that gets students to apply the Photoshop skills that they have developed to produce a poster on a topic of their choice
Module 2 Chapter Descriptions
Chapter 12: Repairing Parts of Images
Students are shown how to clone parts of a car to repair scratch marks and to remove an object (a cat) from the front of the car using the Clone Stamp tool and the Healing Brush tools. The car is then cropped to straighten it and to remove parts of the background.

Chapter 13: Applying Filters
Filters including Gaussian Blur, Reduce Noise and Sharpen are applied to a photo to improve it. A lighting effect filter is applied to the car, then edited.

Chapter 14: Creating Balls and Spheres
Demonstrates how to quickly create balls that can be duplicated, resized and have their colour adjusted.

Chapter 15: Applying Artistic Filters
Demonstrates how to use the filters within Photoshop to create artistic sketches. A shipwreck viewed through the porthole of another ship is created.

Chapter 16: Adjustment Layers
The use of a range of Adjustment layers are demonstrated to improve the appearance of photographs. The examples covered are Levels layers, Brightness/Contrast layers, Gradient Map layers and Solid Fill layers. For example, dark buildings in a photo are lightened whilst maintaining the original sky colour.
Chapter 17: Adjusting Photos of Faces
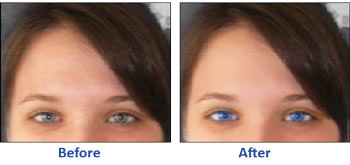
This chapter demonstrates how to use layers to enhance the photograph of a face, including softening skin tones, whitening teeth, highlighting eyes and changing eye colour.
Chapter 18: Using Rulers and Grids
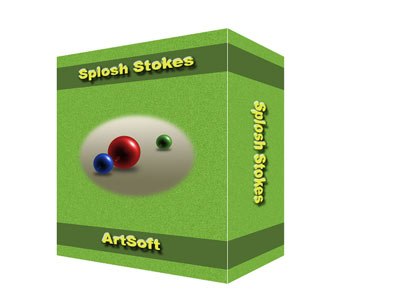
Demonstrates how to create three-dimensional boxes using Rulers and Grids. The following product box for a software company is created.
Chapter 19: Graffiti on a Brick Wall
Demonstrates how to create a brick wall from the Texturizer filter then add some graffiti text to it and apply some lighting effects.

Chapter 20: Enhancing Photos
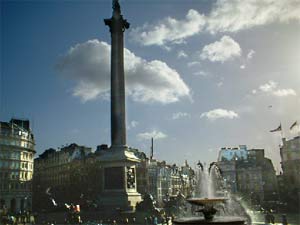
Students are shown some of the professional colour adjustment tools that Photoshop provides to repair the appearance and colour in poorly taken photos. The Correct Camera Distortion tool, the Auto Smart Fix Tool. the Unsharp Mask tool and Levels Layers are used to repair the following photo of a building which had a bluish tinge to it

Chapter 21: Displacing Images
Demonstrates how to add depth and motion to an image by displacing an image with curves into a 2D flag.

Chapter 22: Creative Text Effects
Demonstrates how to combine text effects into a scene with lighting effects.

Chapter 23: Useful Tools
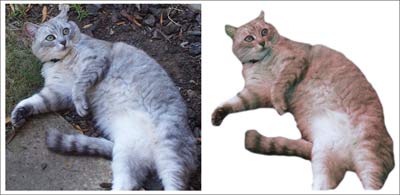
To complete the module some of Photoshop's handy tools are demonstrated, including the Magnetic Lasso and the Magic Extractor Tool to select objects within a photo, the Replace Colour tool, the Recompose Tool and the Straighten Tool. The following cat is selected from a background and recoloured.
Project 2: VicSports
The Multi-user version provides a project that requires students to create two pages for VicSports, a government organiisation set up to promote sport in schools. Students are required to produce the first page of a web site and an advertising collage poster.
| Home | Products | iPad | Downloads | Testimonials | Ordering | Contact Us |