Learning Adobe DreamWeaver CS6
by Greg Bowden (506
pages)
 |
The Learning Adobe DreamWeaver CS6 tutorials provide activity-based web page authoring lessons for beginners and advanced users. There are two modules available:
Module 1 introduces the Adobe DreamWeaver CS6 basics. Module 2 covers advanced Adobe DreamWeaver CS6 features.
A sample book with the first few pages of each chapter can be downloaded from the following zip file:
Learning DreamWeaver CS6 Module 1 Sample (21 MB)
An iPad specific interactive PDF version is also available (see IPad Version tab below). |
Prices (Including GST)
Products can be purchased using a School Purchase Order Number, Credit Card or PayPal.
Learning Adobe DreamWeaver CS6 Module 1 Single-user, $A11 |
|
Learning Adobe DreamWeaver CS6 Module 2 Single-user, $A11 |
|
Learning Adobe DreamWeaver CS6 Module 1 Multi-user, $A132 |
|
Learning Adobe DreamWeaver CS6 Module 2 Multi-user, $A132 |
- Chapters and Sample Pages
- More Details
- IPad Version
Module 1: DreamWeaver CS6 Basics
Contents (Modules 1 and 2) |
view pages (217k) |
Chapter 1: Introduction to DreamWeaver CS6 (21 pages) |
|
Chapter 2: Using Text and Graphics (24 pages) |
view sample pages (1.31 Mb) |
Chapter 3: Using Tables (28 pages) |
|
Chapter 4: Creating Links (13 pages) |
view sample pages (3.26 Mb) |
Chapter 5: Anchor Points and Hotspots (18 pages) |
|
Chapter 6: Site Assets and Library Items (22 pages) |
view sample pages (1/36 Mb) |
Chapter 7: Absolute Position Elements (21 pages) |
|
Chapter 8: Using Templates (24 pages) |
view sample pages (1.04 Mb) |
Chapter 9: Creating Forms (39 pages) |
view sample pages (1.40 Mb) |
Chapter 10: Rollover Images (16 pages) |
|
Chapter 11: Checking and Uploading Web Files (16 pages) |
|
Project 1 Multi-user version only (4 pages) |
Module 2: DreamWeaver CS6 Advanced Exercises
Chapter 12: Cascading Style Sheets (21 pages) |
view sample pages (1.27 Mb) |
Chapter 13: Sample CSS Page Layouts (6 pages) |
|
Chapter 14: Creating a CSS Based Page (17 pages) |
view sample pages (1.12 Mb) |
Chapter 15: Adding Content to CSS Pages (14 pages) |
|
Chapter 16: Formatting CSS Pages (24 pages) |
view sample pages (1.24 Mb) |
Chapter 17: Using Behaviours (22 pages) |
view sample pages (1.10 Mb) |
Chapter 18: Editing and Importing Tools (12 pages) |
|
Chapter 19: Inserting Media (16 pages) |
view sample pages (1.28 Mb) |
Chapter 20: Menus, Tabbed Panels and Widgets (20 pages) |
view sample pages (1.18 Mb) |
Chapter 21: Commands and Snippets (18 pages) |
|
Chapter 22: Creating Mobile Applications (18 pages) |
view sample pages (1.33 Mb) |
Chapter 23: Fluid Grid layouts (20 pages) |
view sample pages (1.36 Mb) |
Chapter 24: Useful Tools (12 pages) |
|
Project 2: Multi-user version only (4 pages) |
|
The tutorials can be used onscreen next to the software package, from a tablet or printed. Assignments are provided at the end of each chapter and the multi-user version provides projects at the end of each module.
Support files that provide all the images and data required to complete the activities are included with the product.
Module 1
Introduces how to set up a site, format text, insert images, use tables, create links, anchor points and hotspots, manage assets, use AP Elements, create templates and forms, insert rollover images and upload files to a remote server.
Module 2
Covers using CSS styles, creating CSS based page layouts, formatting CSS based pages, using behaviours to validate forms and create help messages, importing Word and Excel files, inserting Photoshop files, Flash Animations and Flash Video, creating spry pop-up menus and tabbed panels, using third-party widgets, creating mobile applications, using fluid grid layouts, CSS Transitions, centring web sites, adding backgrounds behind sites and commands and snippets
Summary of Module 1 Chapters
Chapter 1: Introduction to DreamWeaver CS6
This chapter demonstrates the different panels and tool bars on the DreamWeaver screen then students are shown how to set up a site.
Chapter 2: Entering Text and Graphics
This chapter provides activities
that demonstrate how to insert text and graphics into a page.
Students are shown how to format text, adjust the size and position
of images, insert page backgrounds and horizontal rules. The
following page is created:

Chapter 3: Using Tables
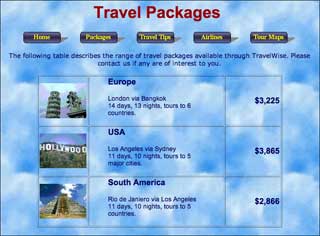
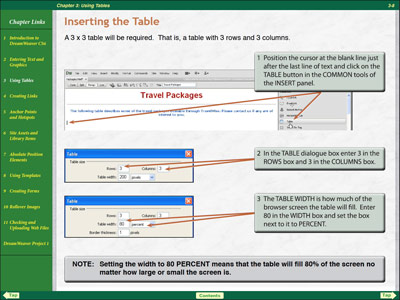
This chapter demonstrates how to insert and format tables. Students learn how to enter text and images into tables, name tables, adjust column widths and row heights, use rulers and grids and add backgrounds to tables. The following Travel Packages page is created:

Chapter 4: Creating Links
This chapter demonstrates how to link text and graphics. Text then graphic links are added to the Travel Packages page.
Chapter 5: Anchor Points and Hotspots
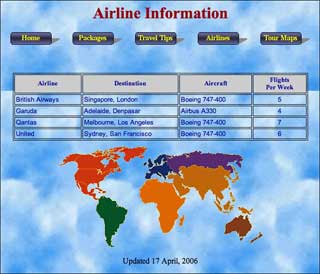
This chapter demonstrates how to add links within a page (anchor links) and how to create links on sections of a page (hotspots or image maps). The following page is used to create hotspots on a world map.

Chapter 6: Site Assets and Library Items
This chapter demonstrates how to use the Assets panel to manage and use the resources of the site, and how to create Library items such as the date a page was updated message on pages and placing link tables as a library items to automate the updating of links on pages. The following page is used to include a navigation bar library item and an updated date library item.
Chapter 7: Using Absolute Position Elements
This chapter provides activities that demonstrate the use of the DRAW AP DIV tool. It covers how to create a AP Elements, insert content into an AP Element, change the stacking order of AP Elements, move AP Elements, place tables within AP Elements, convert AP Elements to tables and vice versa. The following page is created:

Chapter 8: Using Templates
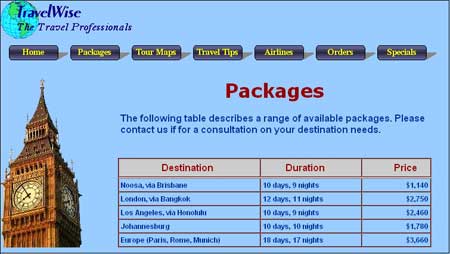
This chapter introduces to concept of templates. A template for the Travel Agency is created and applied to other pages in the site. Adjustments are made to the template to show how all the pages set to the template are also adjusted. A table is created and modifies to create the structure of the following template:
Chapter 9: Using Forms
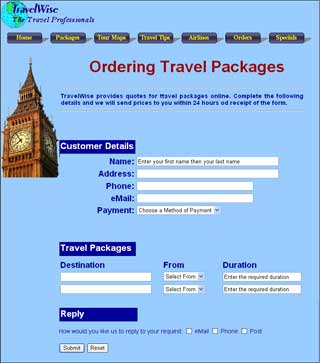
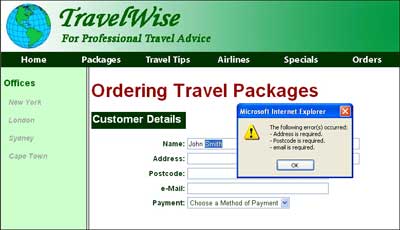
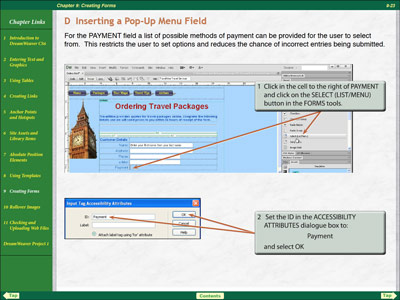
This chapter demonstrates how to create Forms. It shows how to insert the form tag, how to insert the text fields, how to insert pop-up menus and add values to the menu, how to insert radio buttons and check boxes, how to insert submit and reset buttons, and how to name the form and set its post properties. The following order form is created:
Chapter 10: Rollover Images
This chapter demonstrates how to add rollover buttons to create a second navigation system. The template is updated to provide buttons along the left side of the page.

Chapter 11: Checking and Uploading Web Files
This chapter demonstrates how to run browser checks and report on web sites, cloak file types and folders that don't need to be uploaded to a remote sever, uploading files to a remote folder and managing files once they have been uploaded.
Project 1
For multi-user version students are set the task of using the web authoring skills that they have learned during the module to create a web site for a used car dealer. All the text needed to complete the project is included.
Summary of Module 2 Chapters
Chapter 12: Cascading Style Sheets
This chapter demonstrates the difference between internal and external CSS style sheets, how to export styles to an external style sheet, the advantages of external style sheets, how to attach external style sheets to pages and using external style sheets within templates.

Chapter 13: Sample CSS Page Layouts
This chapter looks at some of the sample CSS based page layouts that DreamWeaver provides. It introduces students to the concepts of laying out pages using CSS.
Chapter 14: Laying Out a CSS Based Page
This chapter demonstrates how to create a CSS based page layout. It includes how to attach a CSS file to a page, how to define DIV tags to regions of the page, how to nest DIV tags and how to set styles to control DIV tags.
Chapter 15: Adding Content to CSS Pages
Students learn how to insert content into the DIV tag regions defined in the previous chapter. A company logo is added to the Banner DIV tag, buttons to the Navigation DIV tag, text links to the secondary navigation region and text to the Content region.

Chapter 16: Formatting CSS pages
This chapter demonstrates how to set styles to control the format and layout of a page. The 4 types of styles are covered - Class, ID, Tag and Compound. Students learn how to apply styles to linked text, along with editing styles and saving the CSS page as a template.

Chapter 17: Using Behaviours
This chapter demonstrates how to use the Tag Inspector panel to set behaviours to provide help messages, popup windows, display larger versions of images, validate data in fields within forms and add effects to images.
Chapter 18: Editing and Importing Tools
This chapter provides activities that demonstrate how to make simple adjustments to images within DreamWeaver using its built in FireWorks tools and how to import formatted text and tables from Microsoft Word and Excel. The following page is created from a supplied Word document.

Chapter 19: Inserting Media
This chapter provides activities that demonstrate how to import Photoshop and Flash media into DreamWeaver pages. Photoshop documents are compressed and linked so that any changes made to the original Photoshop files are automatically updated within the DreamWeaver page. Flash animations and Flash video are also imported.

Chapter 20: Menus, Tabbed Panels and Widgets
The Spry Menu Bar widget is used to create a popup menu navigation system. The Spry tabbed panels widget is used to create tabbed panels, which allow more content to be stored on a page. The Widget tool is used to add third-party widgets such as Google Maps and YouTube Player to pages from the Adobe Exchange site.

Chapter 21: Commands and Snippets
This chapter demonstrates how to create custom Commands via the History panel that can be re-used as required, how to add DreamWeaver's supplied Snippets to pages and how to create customised snippets.
Chapter 22: Mobile Applications
This chapter how to create mobile applications for use on smart phones using the JQuery Mobile tools. A supplied template is used then students are shown how to insert a Layout Grid, Collapsible Blocks and buttons. The application is then formatted using the JQuery Mobile Swatches panel.

Chapter 23: Fluid Grid Layouts
This chapter demonstrates how to Fluid Grid Layouts which adjust to match the viewing screen size. A layout is created with 4 columns for desktop sized screens, 3 columns for tablet sized screens and 2 columns for smart phone sized screens. Some brief content is added so that students can see how to add content to the layout and how the content changes as the screen size is changed.

Chapter 24: Useful Tools
This chapter demonstrates how to change the work page sizes to suit the application the web page is being created for and how to use CSS Transitions to add animated effects to page elements using CSS.
Project 2
The multi-user version provides a detailed project.
Students are set the task of using the web authoring skills that they have learned during the module to create a CSS based web site on a topic negotiated with the teacher, or on the provided details about a Real Estate Agency. All the text needed to complete the Real Estate task is included.
iPad Version
iPad specific ebooks of the tutorials are available to take advantage of the multi-touch features of the iPad. These ebooks can be placed on as many iPads that the school requires and the screen/print version is also supplied. Current purchasers of the multi-user versions of Learning DreamWeaver CS6 can upgrade to the iPad versions for $44 inc GST per module. To download a sample ebook providing the first few pages of each chapter click on the following link.
The following are sample screenshots of the materials.



| Home | Products | iPad | Downloads | Testimonials | Ordering | Contact Us |